

Jennifer Brum

April Smith via Style Me Pretty
Here's what you'll need to make your own mossy initials.

- A large piece of styrofoam insulation (the pink stuff works just fine!) , cardboard letters would also work. We used 1/2" thick insulation and doubled up the layers for strength.
- Box cutter
- Sharpie
- Spray adhesive
- Sandpaper
- Spray paint (I used a light green color)
- Spanish moss
Instructions:
1. Draw the letters onto your stryofoam with a permanent marker. 
2. Carefully cut the letters out with a box cutter. 3. If your styrofoam is thin like ours, trace the letter you just cut out onto more styrofoam. This will be your second layer to strengthen the letters.
  4. Carefully cut out your second letter with a box cutter.
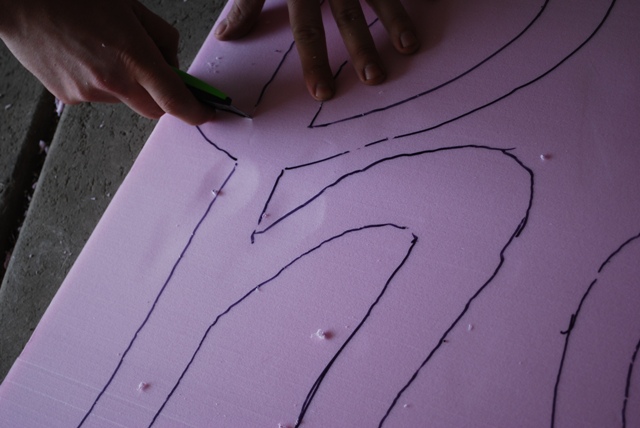 5. Now you have your two layers!
 6. Apply spray adhesive to the front side of the bottom layer and to the back side of the other top layer.
 7. Match the edges and carefully press the two layers together. Now you will have one letter with double the thickness.
 8. Use sandpaper to smooth the edges of the letter. Sand, sand, sand until all edges are complete.
 9. If you are using insulation, remove the plastic covering from the top and bottom of the letter. This is an important step! If you forget to do this, the paint and glue in the next steps might rub off.
 10. Spray the top, bottom, and all edges of the letter with spray paint. Be careful not to spray too close, or the paint will eat away at the styrofoam.
  11. Wait for the paint to dry!
 12. When the paint is dry, apply spray adhesive to the top and all edges of the letter.
 13. Spread the spanish moss over the letter to cover it.
  To help the moss stick, squeeze it around the edges of the letter.
 14. Admire your pretty initials! Depending on how you plan on hanging them, you will have to add a ribbon, mounting tape, etc. to the back of the letter. We're going to add some plum double faced satin ribbon to the tops of ours (similar to the first inspiration photo), but I haven't ordered the ribbon yet.
Hope you enjoyed the tutorial!


6 comments:
they came out great!
Damn, they look gorgeous!
You did a great job :-)
I didn't know that it is that easy to do...
Thx for sharing!
Very nice!
I LOVE these step by step instructions! How could it go wrong?
Wow! Your initials turned out GREAT!!! Thanks for sharing the how-to steps. Your tutorial makes it look pretty easy!
Hi, I'm Amanda and I'm getting married in 58 days :/!!! I have so much to do it's not even funny! So I needed some ideas on how to decorate the pews in the Church & your picture with the purple flowers w/the green ribbon was my favorite. So I started looking around you site and we have the same bridesmaids dresses & I wanted the monograms as well. In fact when I saw yours I almost got mad!! haha! But yours look amazing!! I just basically wanted to tell you that your blog has been a huge blessing with so many great ideas and the directions on how to do them! So thank you!!
Post a Comment